Create Instance
Use this guide to create your first Clawbus instance and set SSH access for terminal login.
Prerequisites
- You can sign in to the Clawbus interface
- You have permission to create an instance
- You have an SSH public key ready (
ssh-rsa/ssh-ed25519)
Step 1: Open the Instance Dashboard
From the Clawbus console, open the Instance Dashboard. If this is your first instance, the list will be empty.
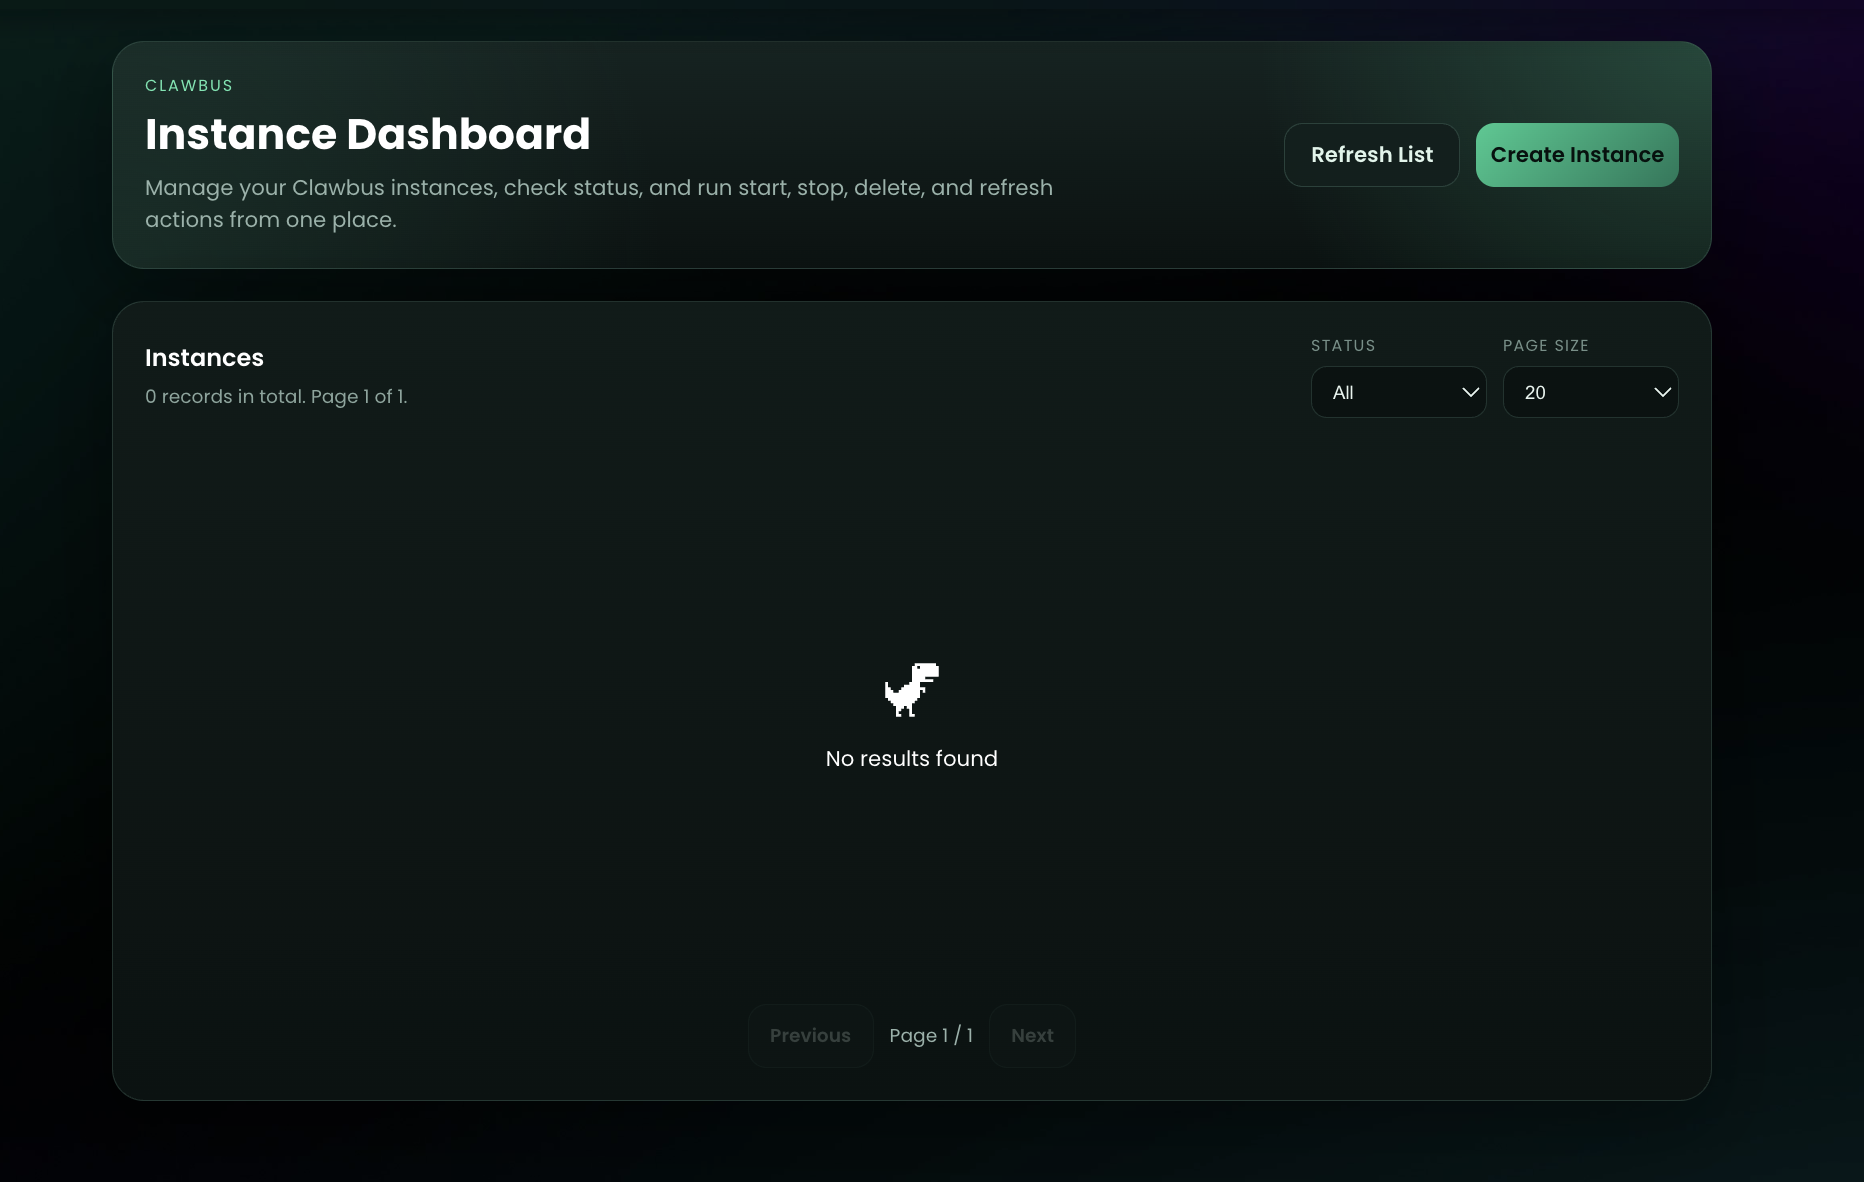
Expected result: You see No results found and a Create Instance button.
Step 2: Create a New Instance
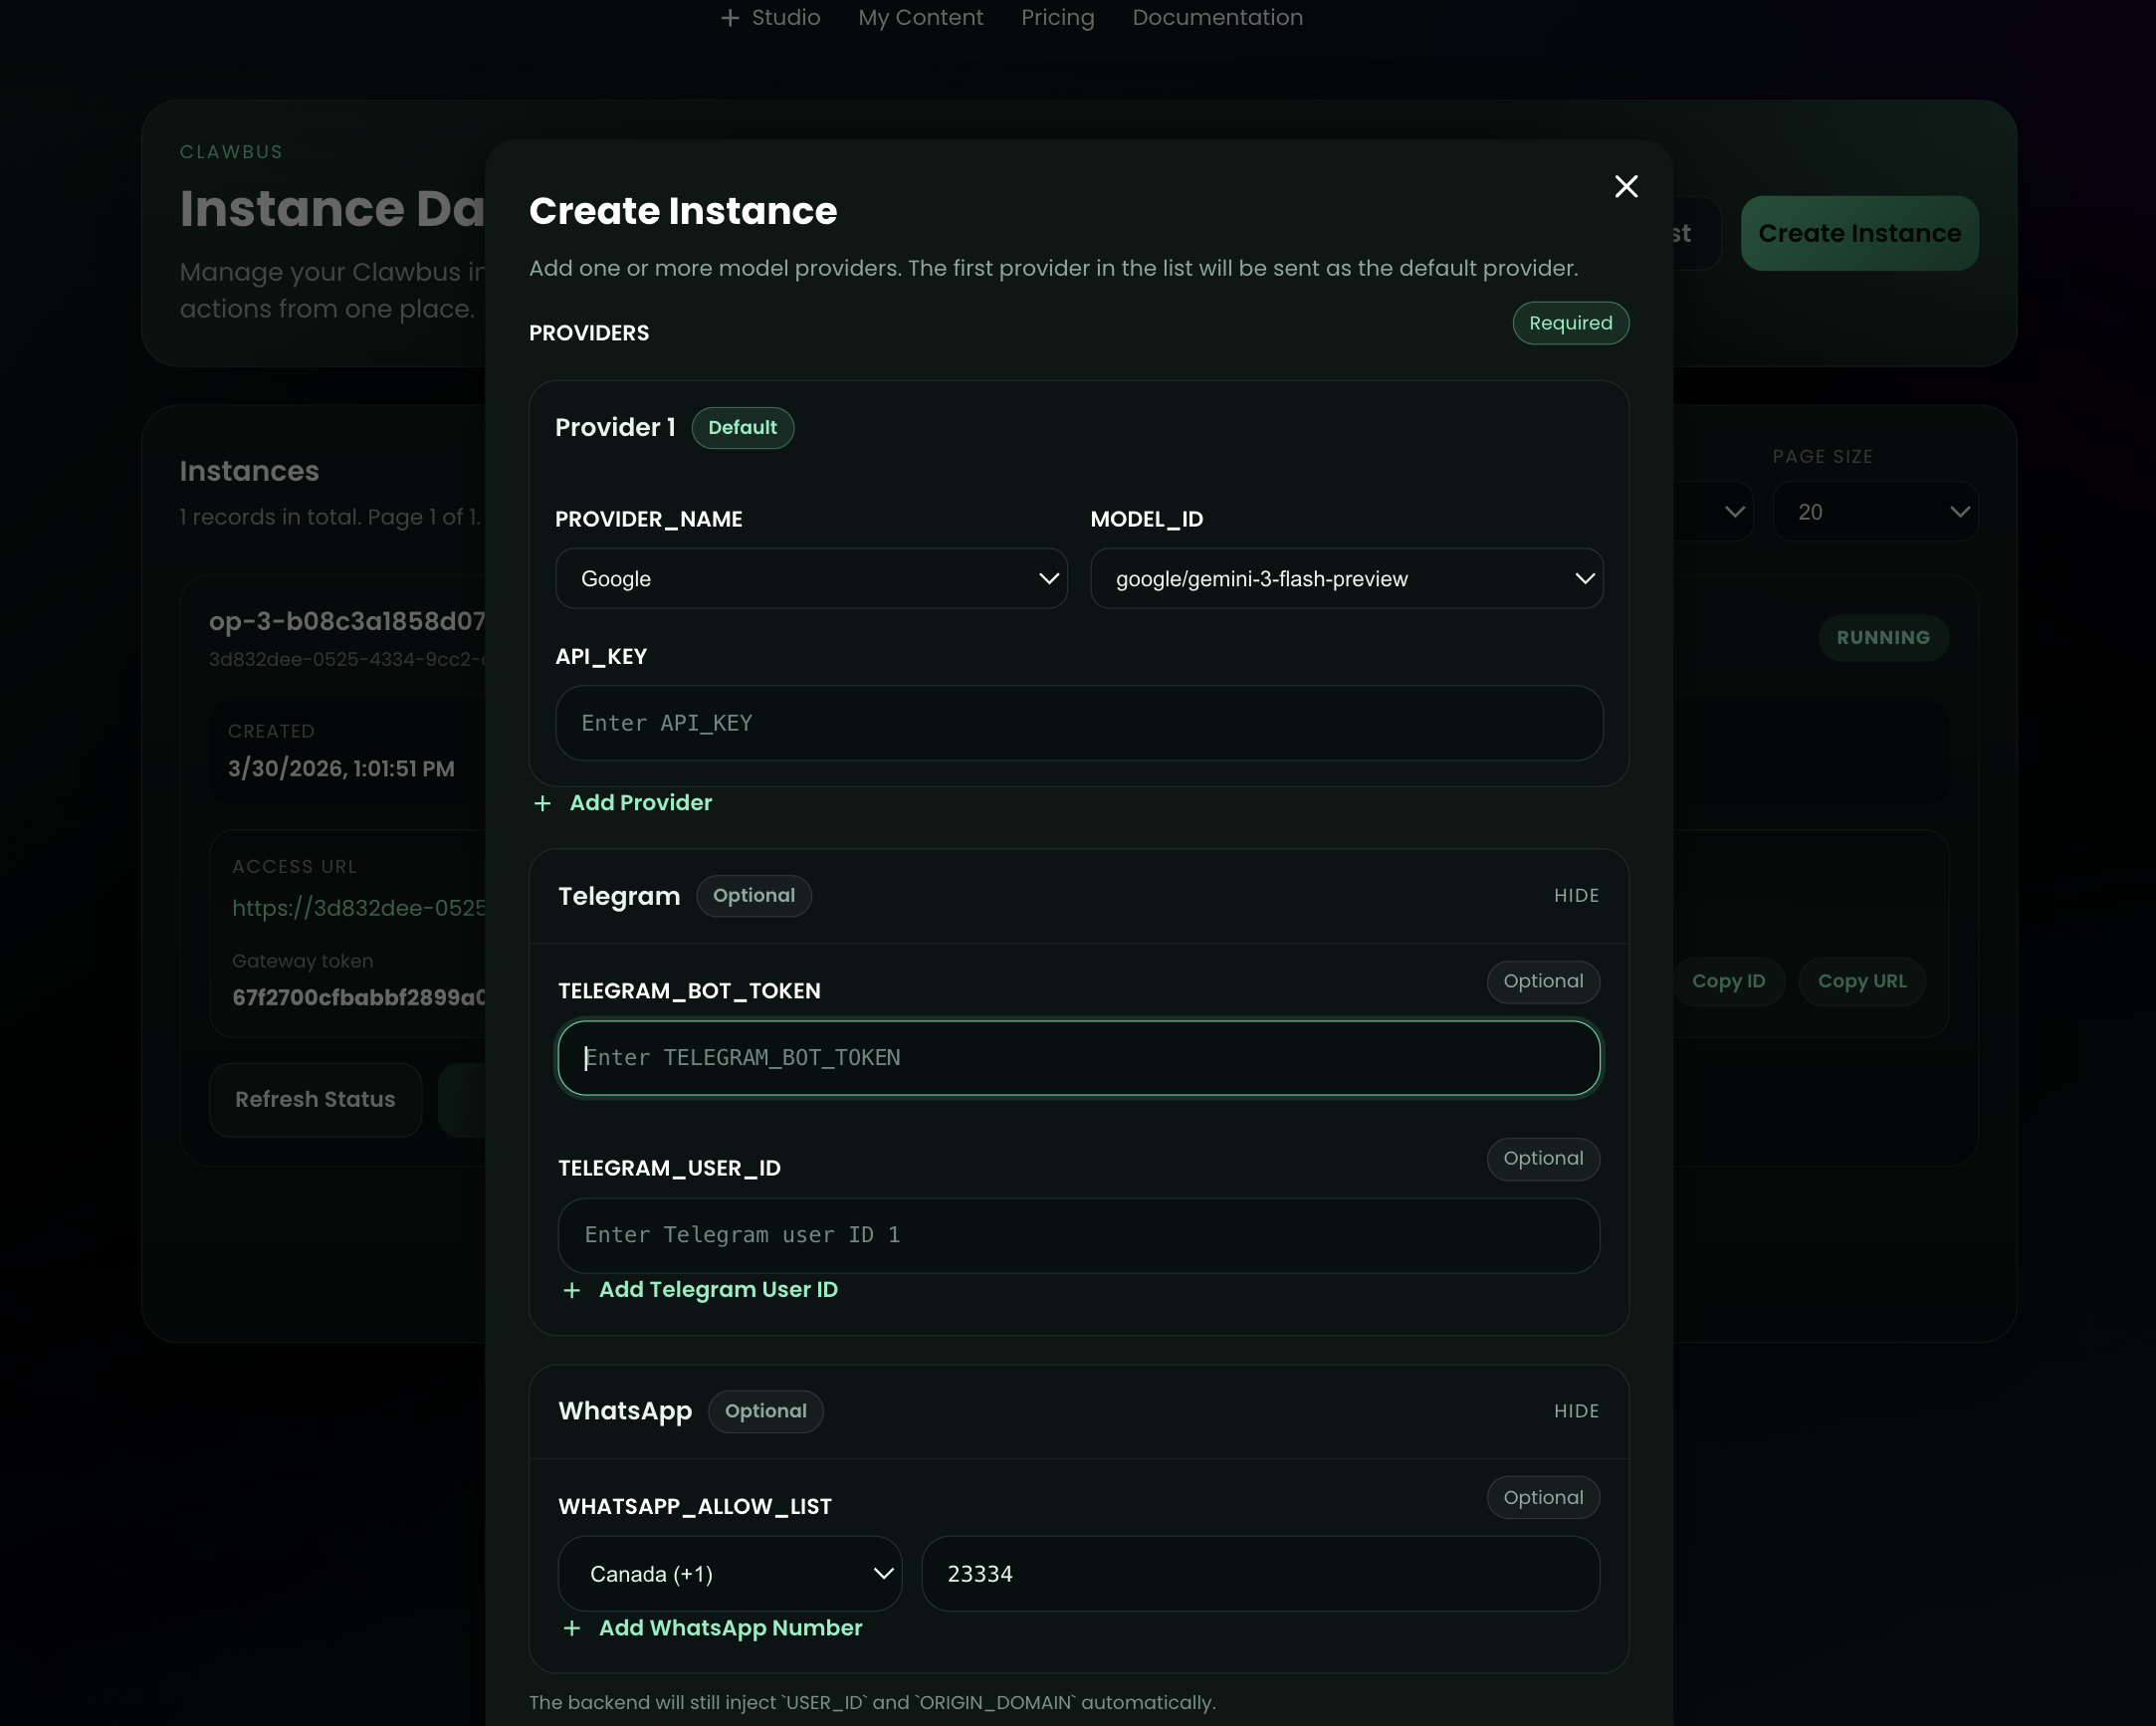
Click Create Instance and complete the form. Based on the current UI, fill at least the required provider block:
PROVIDER_NAME(example: Google)MODEL_ID(example:google/gemini-3-flash-preview)API_KEY
Optional sections:
- Telegram bot/user fields
- WhatsApp allow-list settings
Telegram Setup (Bot Token + User ID)
If you plan to connect Telegram in Step 2, collect these two values first:
TELEGRAM_BOT_TOKENTELEGRAM_USER_ID
Get TELEGRAM_BOT_TOKEN
- Open Telegram and start a chat with @BotFather.
- Run
/newbot. - Follow prompts to set a bot name and username.
- Copy the bot token from BotFather and keep it private.
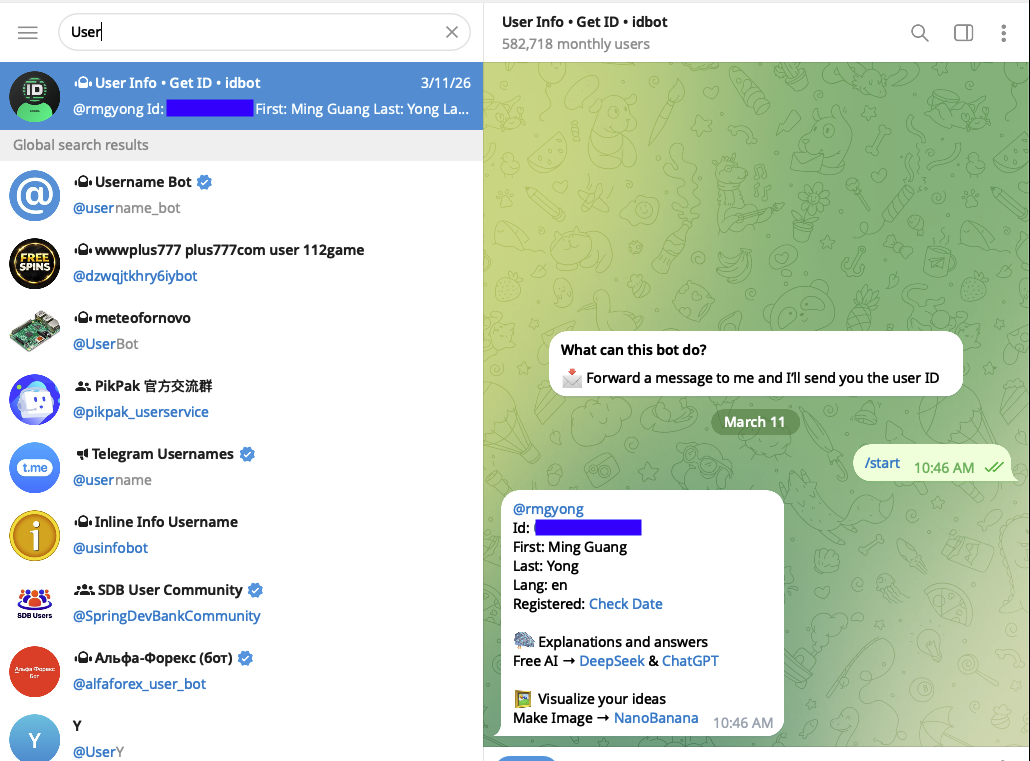
Get TELEGRAM_USER_ID
- In Telegram, search for @userinfobot (or
idbot). - Open the bot chat and send
/start. - Copy the numeric
Idvalue shown by the bot. - Use that numeric value as
TELEGRAM_USER_IDin the Create Instance form.
If the ID is not shown, send a regular text message after /start and retry.
Submit the form to start provisioning.
Expected result: The modal closes and the new instance appears in the dashboard.
Step 3: Confirm Instance Is Running
On the instance card, confirm:
- Status shows RUNNING
- Access URL and Gateway token are visible
- Action buttons like Refresh Status, Set SSH Key, and Copy URL are available
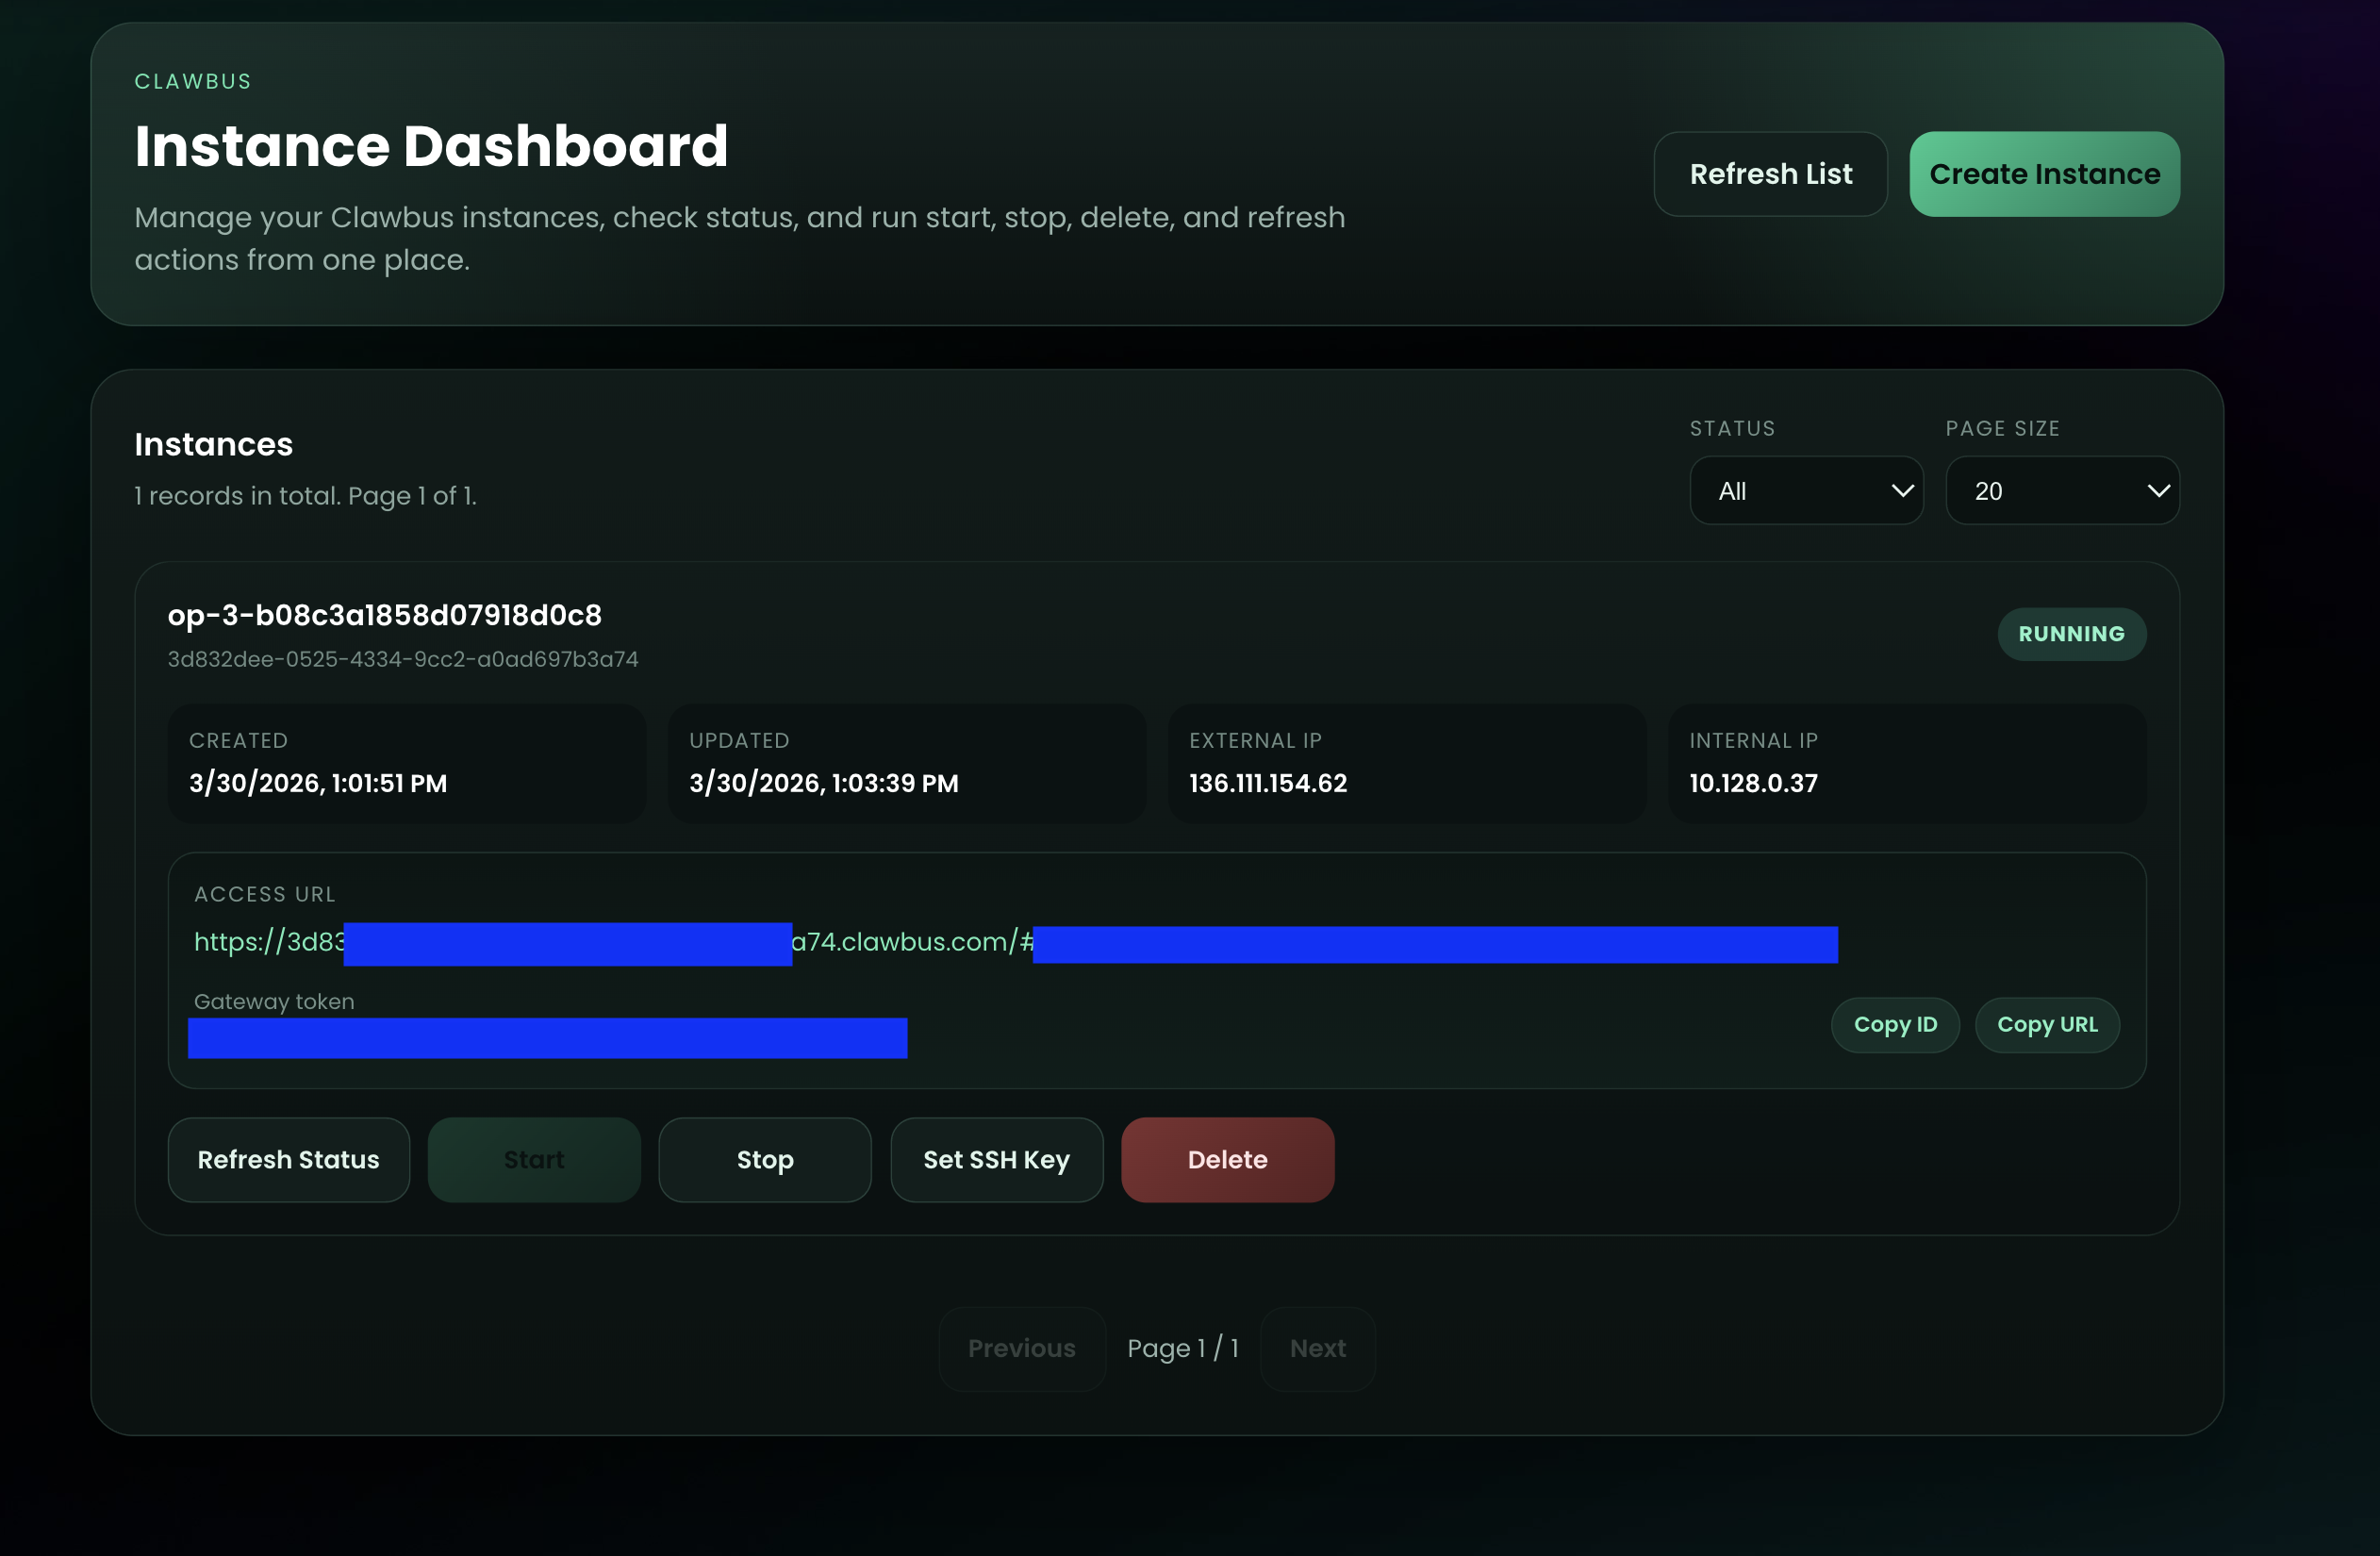
Once your instance is confirmed running, access your Clawbus instance from the Access URL. The URL format is:
https://[instance UUID].clawbus.com/
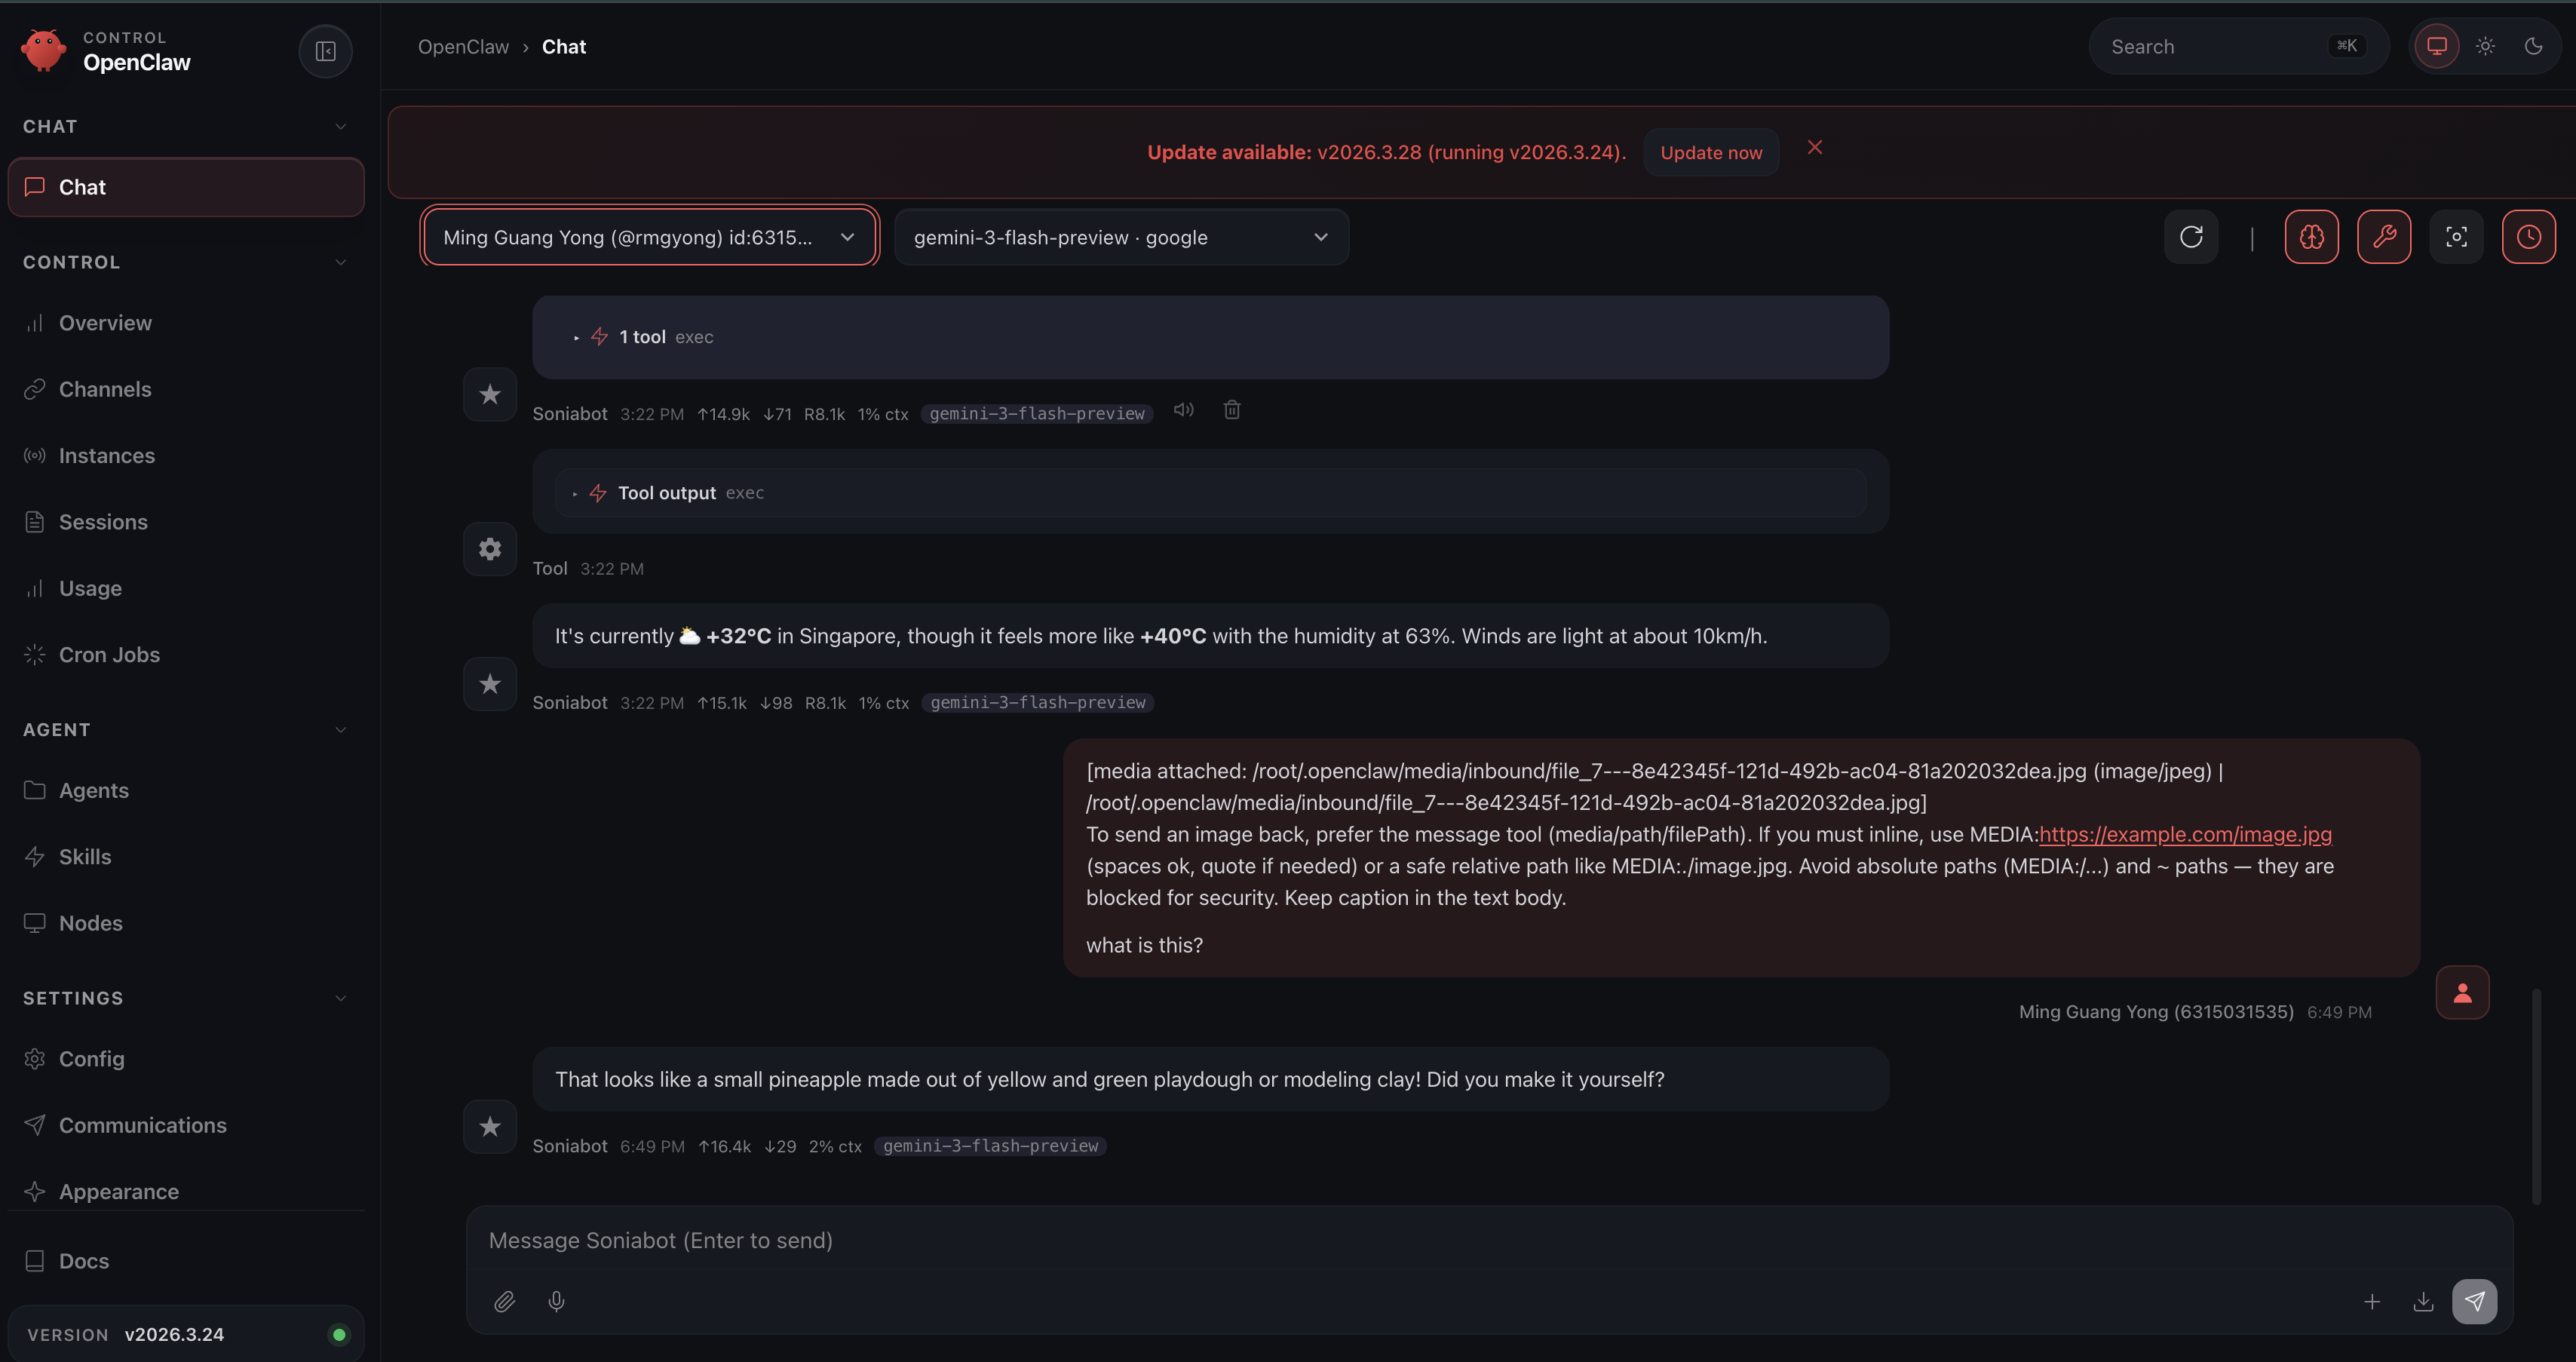
Click the Access URL to open the OpenClaw Web UI control panel. From there, go to the Chat tab to chat directly with your OpenClaw agent.
Expected result: Instance provisioning is complete, and you can open the OpenClaw Web UI from the Access URL.
Step 4: Set SSH Key (Optional)
This optional step allows you to SSH into your Clawbus instance.
Click Set SSH Key on the instance card. In the modal:
- Confirm the
INSTANCE ID. - Enter your Linux
Username. - Paste your SSH
Public Key. - Click Save SSH Key.
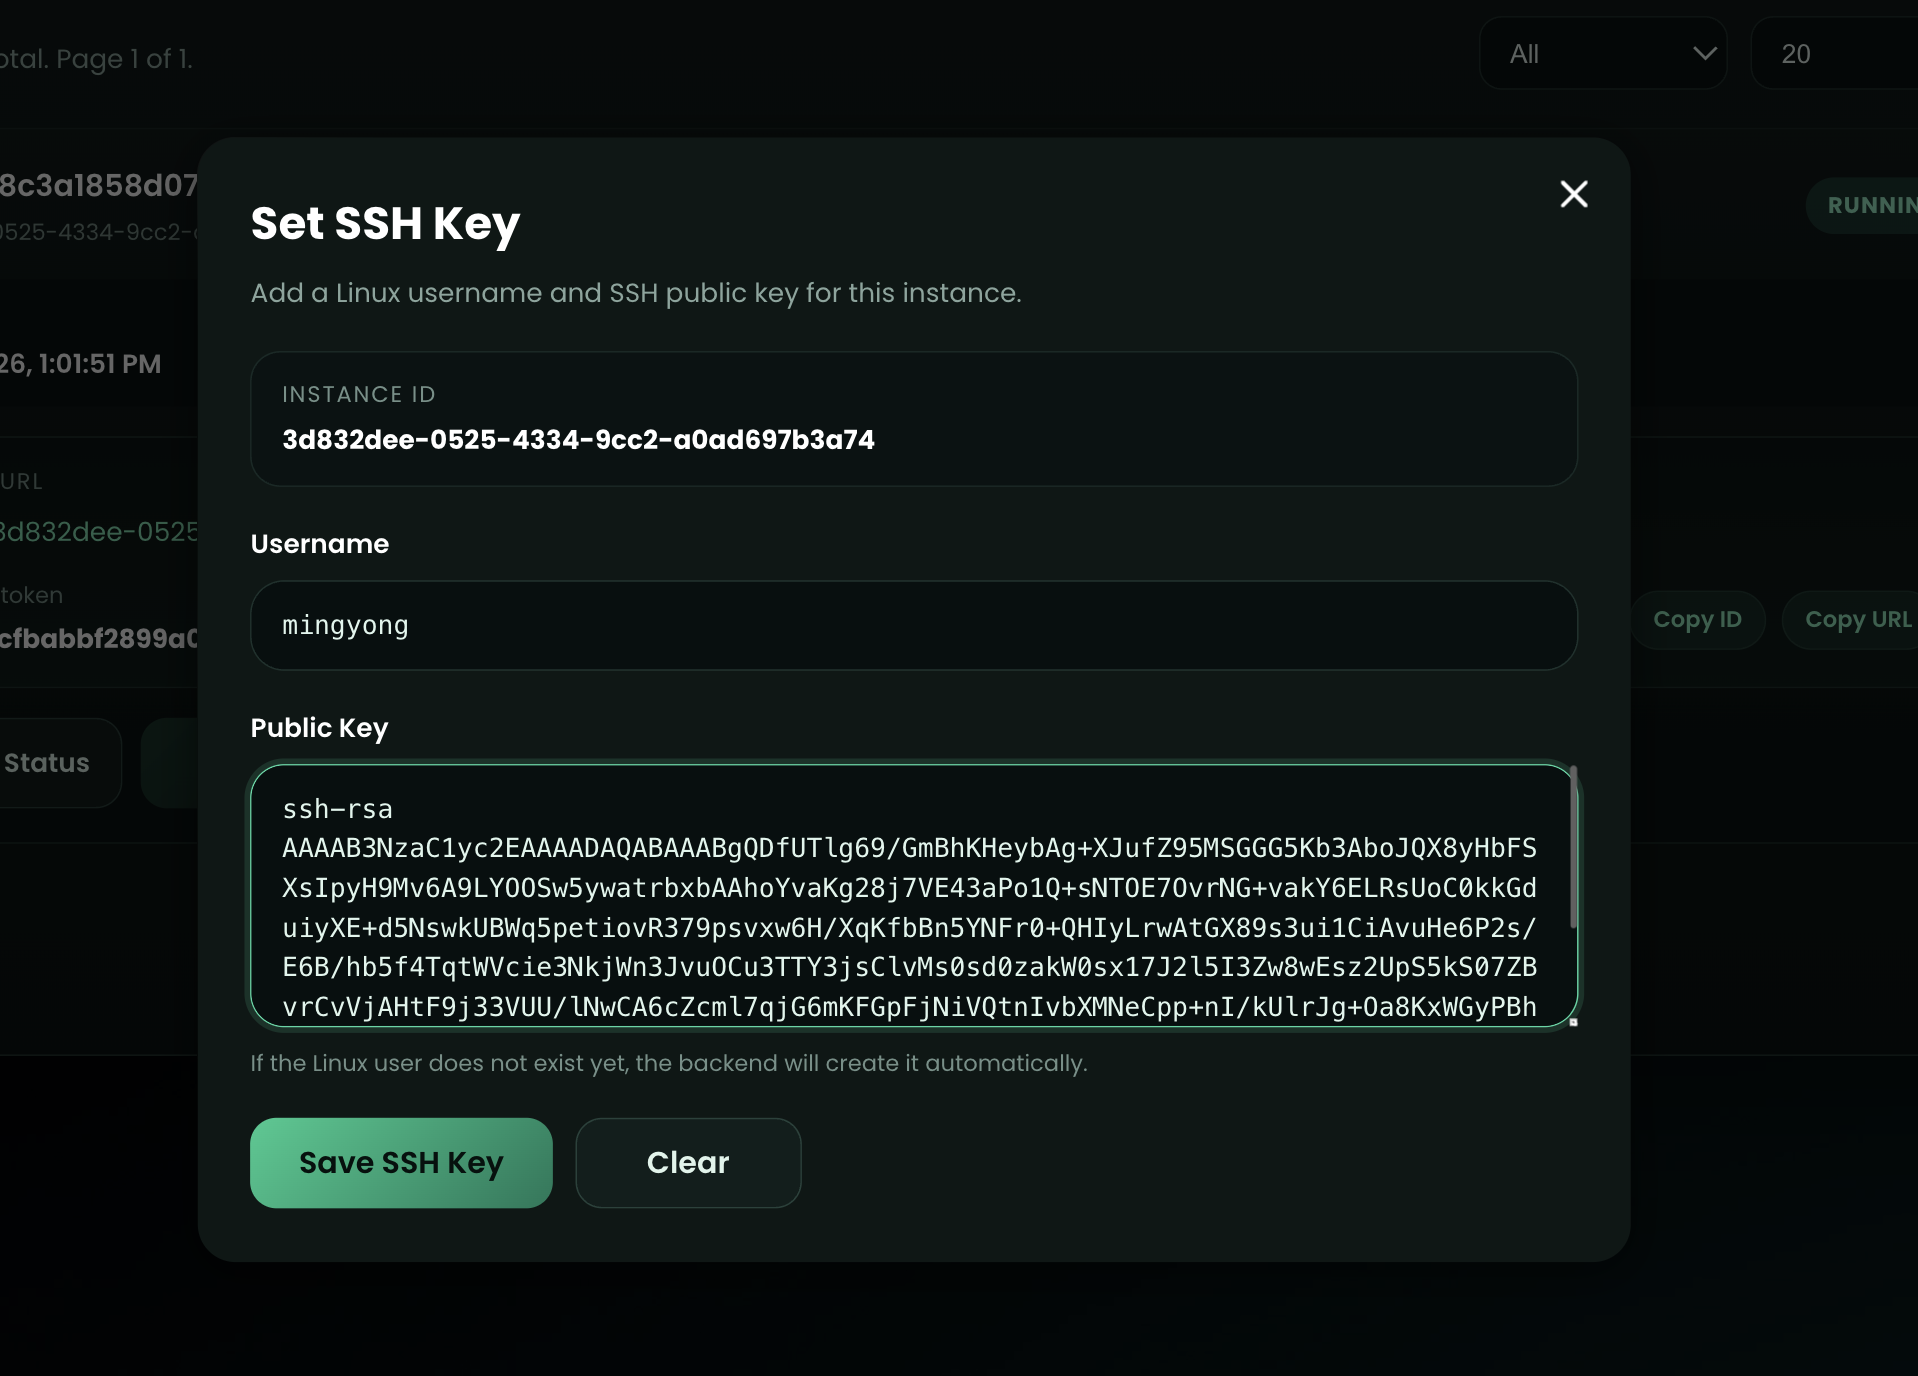
Expected result: SSH key is saved for this instance, and the backend creates the Linux user automatically if it does not exist.
Verification Checklist
- Instance status is
RUNNING. ACCESS URLandGateway tokenare present.- SSH key save action completes without validation error.
- You can connect from terminal using your configured username and key.
Troubleshooting
Create Instance form will not submit
- Confirm required provider fields are filled (
PROVIDER_NAME,MODEL_ID,API_KEY) - If Telegram is enabled, confirm both
TELEGRAM_BOT_TOKENandTELEGRAM_USER_IDare set - Remove accidental whitespace in API key values
- Retry after clicking Refresh List
Instance remains unavailable after create
- Use Refresh Status and wait for provisioning to finish
- Confirm your provider credentials are valid
- Recreate the instance if it is stuck in a failed state
Save SSH Key fails
- Ensure public key format starts with
ssh-rsaorssh-ed25519 - Confirm you pasted the public key (not private key)
- Verify username uses a valid Linux account format
SSH connection issues after key save
- Confirm you are using the same username configured in Set SSH Key
- Confirm your local private key matches the uploaded public key
- Re-save the SSH key and retry the connection
Telegram messages are not received
- Confirm bot token is copied exactly from BotFather
- Confirm user ID matches the numeric
Idshown by@userinfobot - Send a fresh message to your bot and retry